
Blazer Front Brake Job

This is a brief walk through of how to do a front brake job on a 2001 Blazer. If you are using this as a reference to do your own brake job, please keep in mind that all cars are different and not everything will look the same or be the same socket or wrench sizes. Also, if you have never done a brake job before, I highly recommend you have someone help you who has done them before so you don't mess something up. If you mess up your brakes, your brakes could fail and you could die or kill others accidentally.
Anyway, with that little disclaimer out the way, get everything you'll need together.
Unlike some of my other blog entries, the following pictures precede the instructions that go with that picture. I'm sure you'll figure it out.
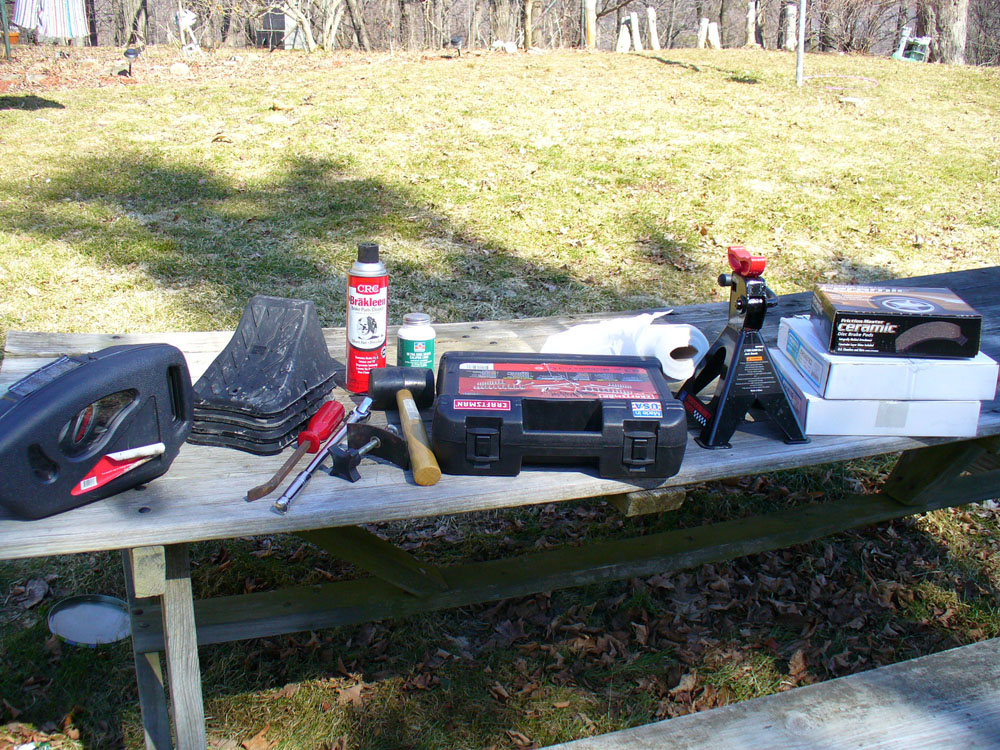
Everything from left to right:
1) Impact driver that plugs into cigarette lighter.
2) Wheel chocks
3) Tools on the bottom include and pry bar, 1/2 socket wrench, brake caliper clamp (I can't remember the actual name of it), rubber mallet.
4) A can of Brakleen and a bottle of brake/caliper greese.
5) Mechanics tool set.
6) Paper towels.
7) 2-1/2 ton Jack stand
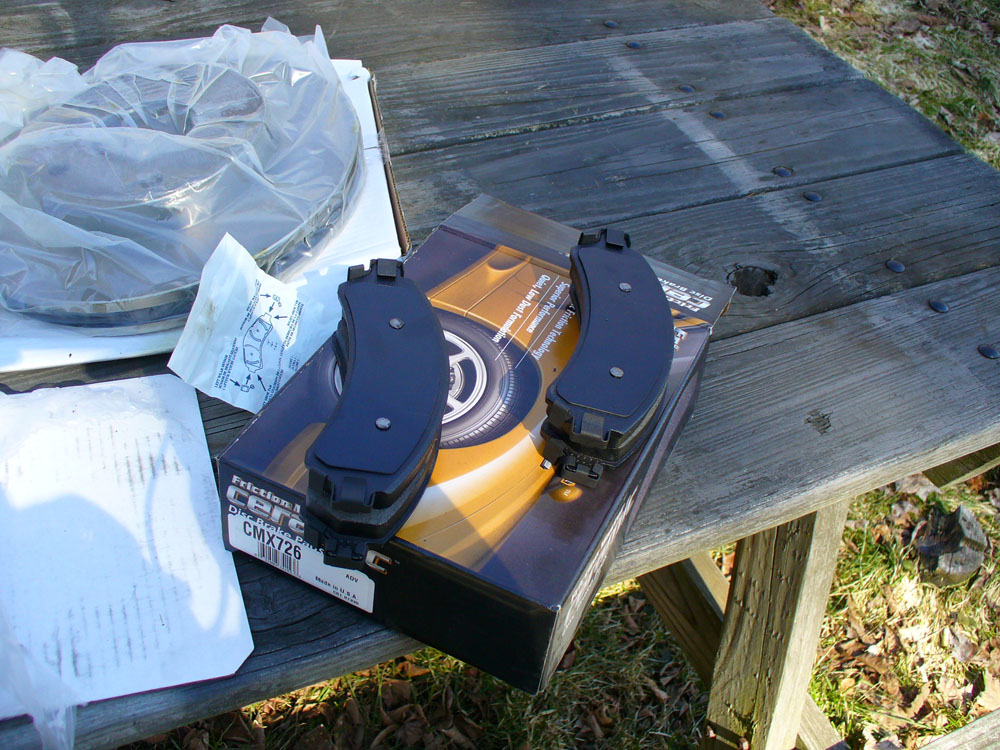
8) 2 new rotors and ceramic brake pads. Ceramics are better and don't have nearly as much brake dust, which means they keep your tires looking much cleaner and free of alot of grime.
Tools and items not shown include my 3-ton floor jack, a bottle of "freeze off" for rusted bolts and an inside shot of my tool set.

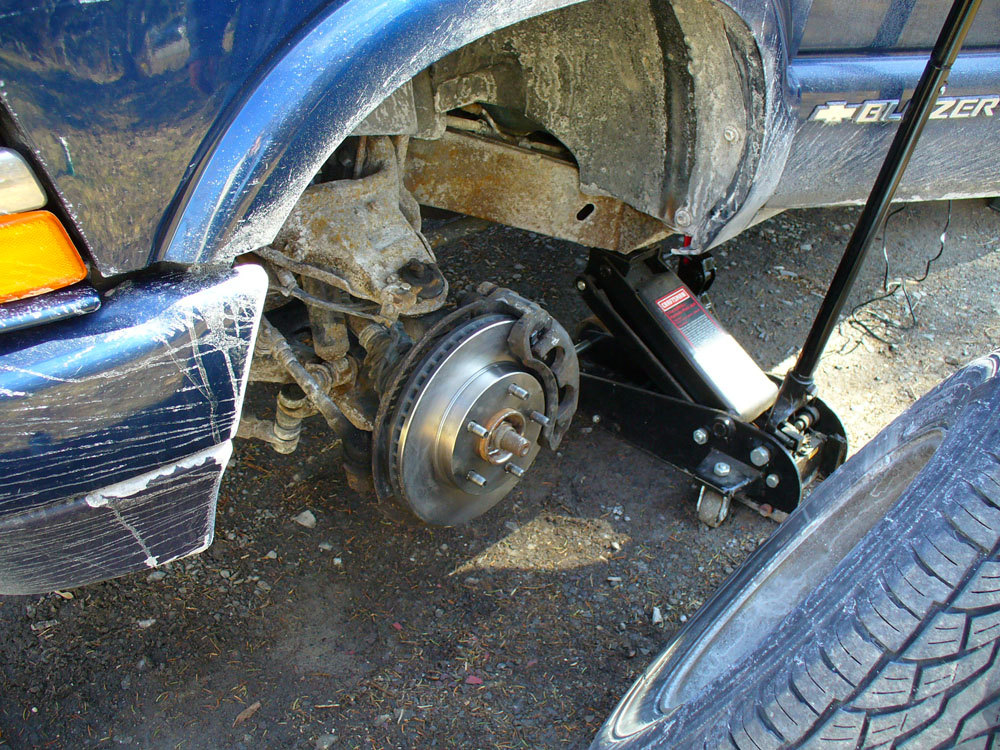
1) Look in your car manual and locate the correct points underneath your car where you can safely jack your car up. You do not want to jack your car on a part of the frame that you think will be ok, only to have your jack put all the weight of the front end of the car on a part of metal that can't take it and thus it'll fuck up your car. BTW, this is my 3-ton floor jack. Before you start jacking up your car, place your wheel chocks around your rear tires so your car does not move on you while jacking. (I forgot to take that pic.)
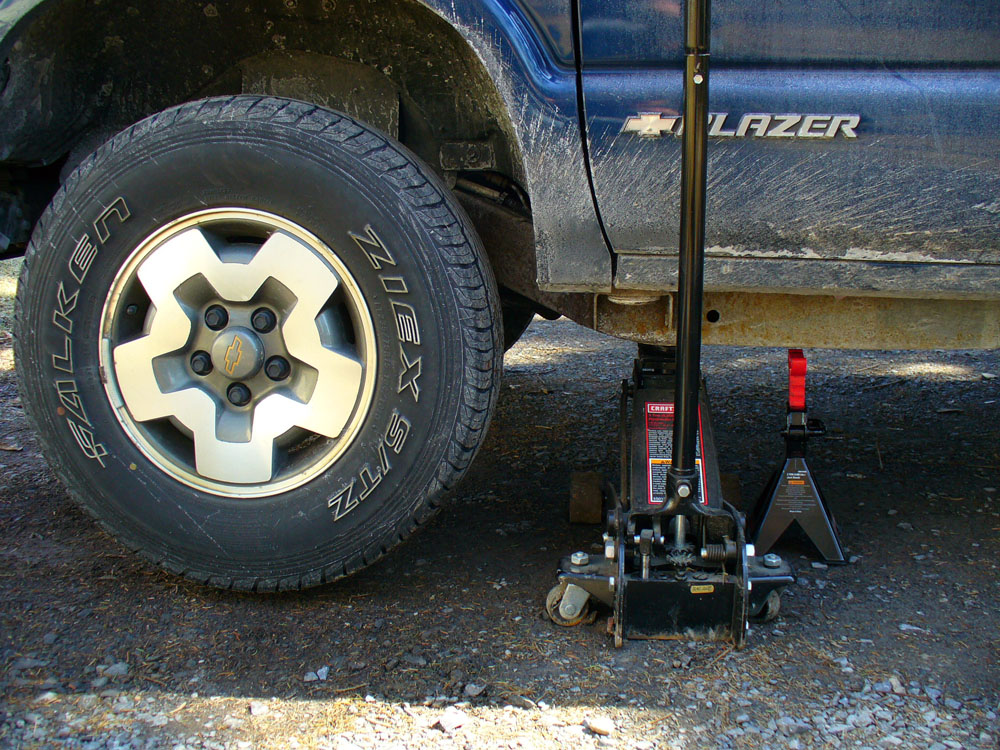
2) If you are using the jack that came with your car, jack up your car high enough to place a jack stand underneath it and lower it down onto it for safety. The jacks that come with cars are pieces of shit and you should not trust them with your head or limb under a vehicle. Only jack your car up high enough for the tire to freely rotate, about a half inch off the ground. I have faith in my jack, so I generally keep it up constantly, but I'll place a jackstand underneath in case some emergency happens and my jack brakes.

3) BTW, you should probably check your new rotors and brake pads at the store to make sure they are free of nicks or brakes.

4) Using an impact driver, most are powered by air compressors and are very expensive but this little one was really cheap and only costed me $30. I bought a better impact driver for it tho ($10ish), because the ones it comes with looked like shit to me.
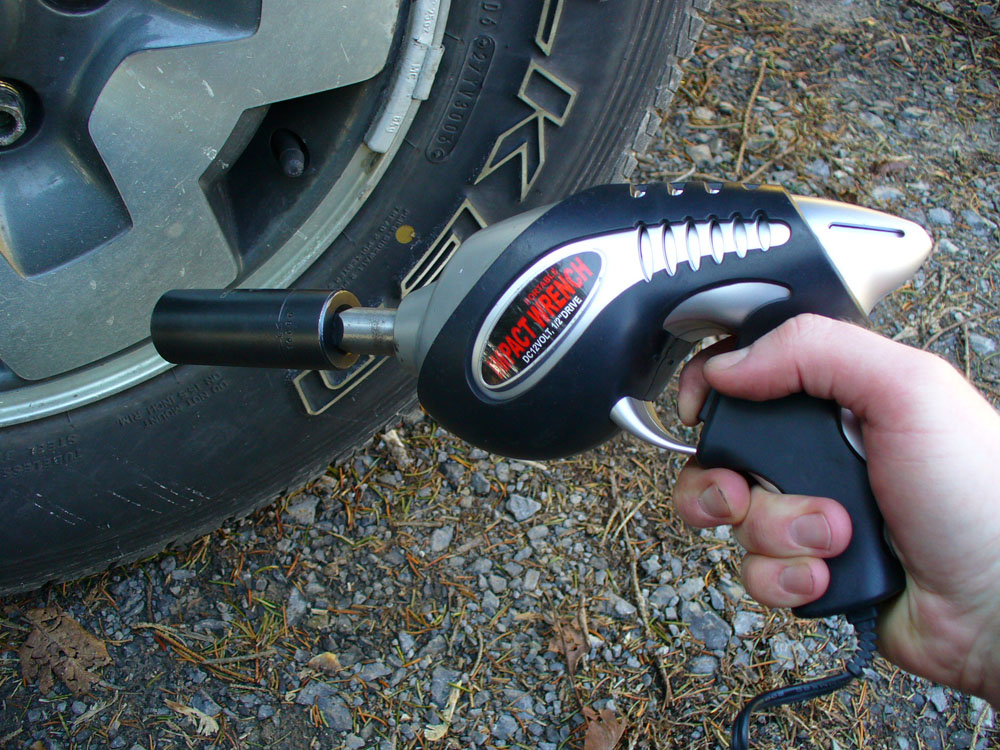
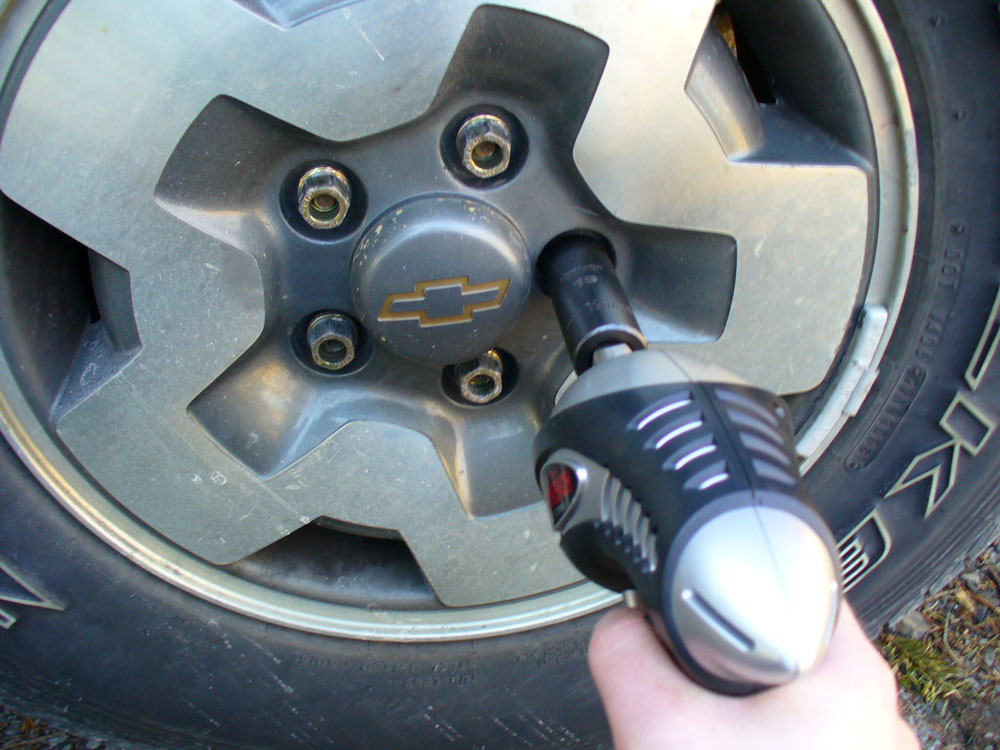
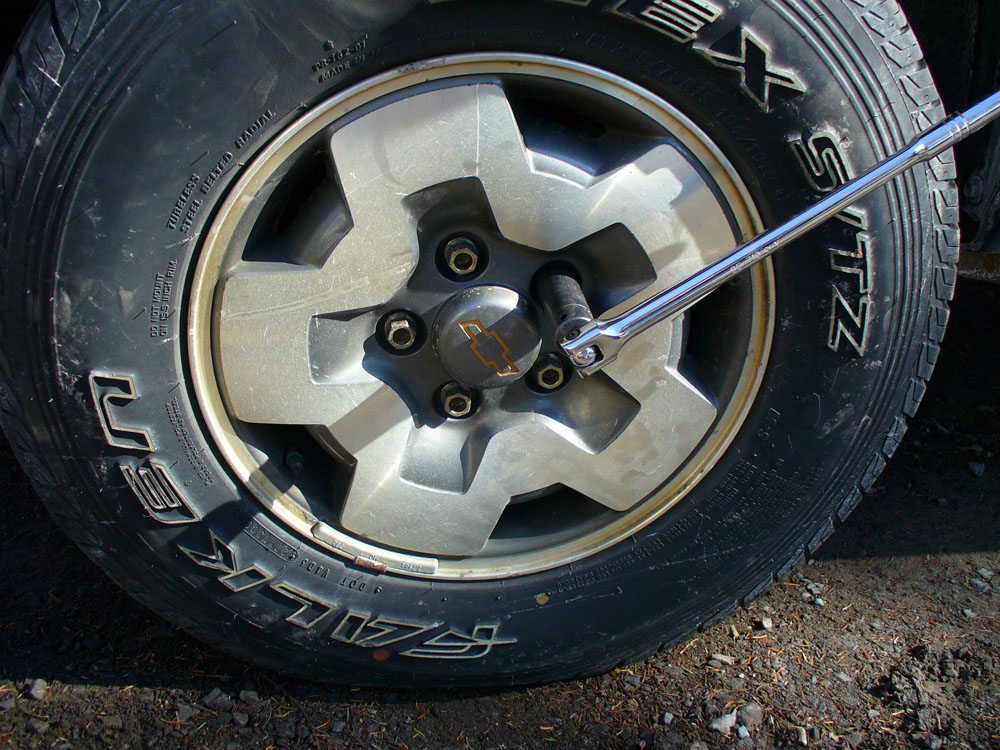
5) If your tire has plastic covers covering the lug nuts, take them off by using a socket on them and taking them off easily by hand. No wrench needed for that. Then use your impact driver to take the lug nuts off. Always loosen the lug nuts first before removing them. Loosen them one after another by loosing the next lug nut opposite the one you just loosened. Never loosen them clockwise or counterclock wise. The lug nuts are on extremely tight, if you take them off one by one or loosen them incorrectly you run a big chance of fucking up your lug nuts and breaking some bolts.
6) Now that the tire is off, you can place it on the ground and use it as a seat to take care of the rest of the job.
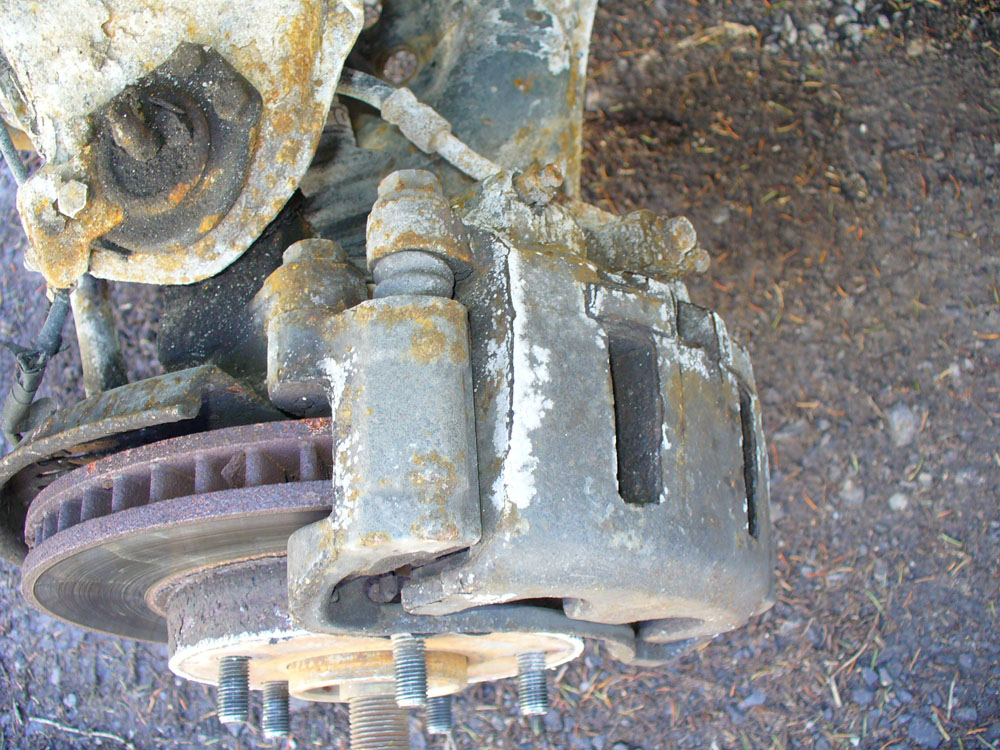
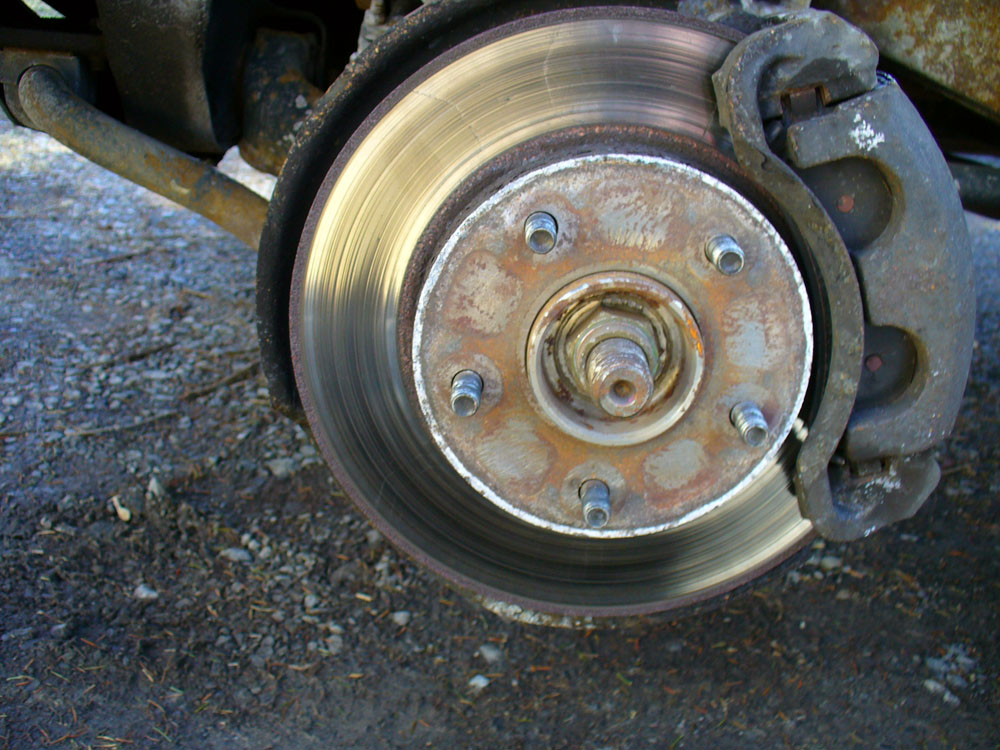
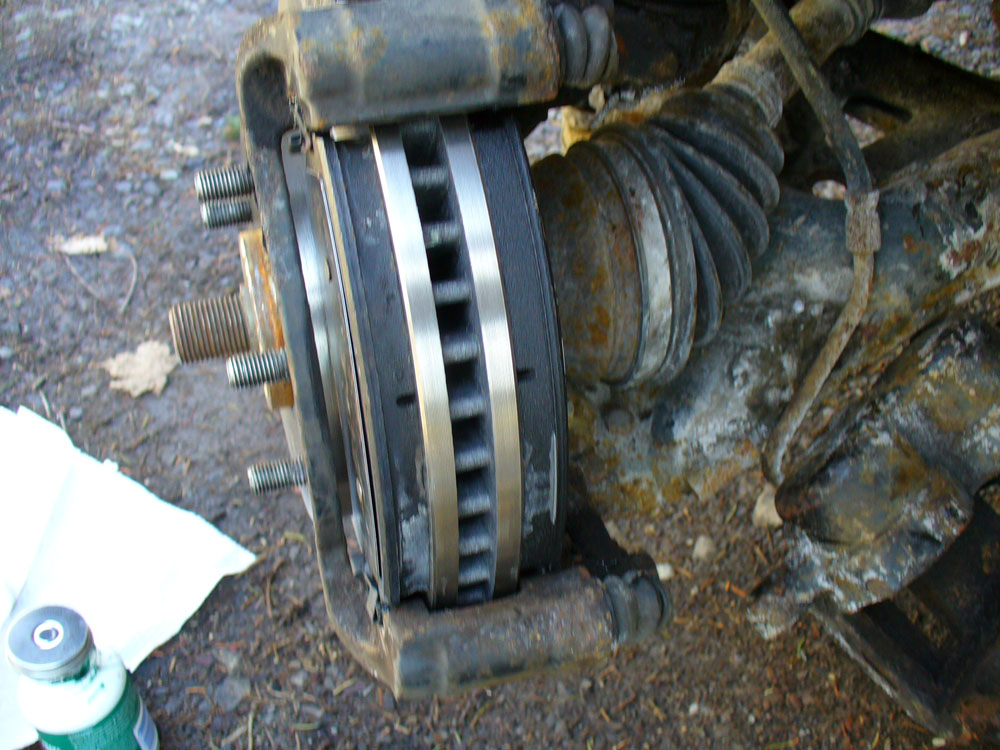
7) Your caliper is the outer part of the brake system. It is connected to the car with a brake line. The caliper is only held on two bolt pins. I call them bolt pins because they are connected like bolts, but once you remove them, the length of the bolt is actually a greesed long metal pin. Its made like that so the bolt pin holds the caliper to the brake pad holder but also gives it the slight movement it needs for brake operation. I forgot to take a picture of the bolt pins. Also, if the bolts do not want to come off, you may have to spray them with some freeze off. If you use freeze off, try not to spray the rotor or brake pads with it. It acts like a lubricant and will cause your brakes to fail. Because I'm replacing the rotors, its not as big an issue. Also, remember which direction actually loosens and tightens the bolts. Because the bolts are facing you, you have to figure out which direction to turn them. If you over tighten them, you will probably shread the bolt head off and that will lead to a costly repair job. Once those pins are off, the caliper may not want to come off because of the brake pressure in the caliper. You will most like have to use a small pry bar to slowly work it off.
8) Once you have taken the caliper off, place it on something so it does not hang from the brake line. A brake line job is extremely expensive and you do not want to damage that brake line by having something that weighs about 5-10 pounds dropping and damaging it. Next, you have to take off the brake pad holder. It has an actual name, but I can't remember it. Its only two bolts like the caliper, but these are actual bolts. And the top one of mine is in a tight spot. I had to carefully turn my steering wheel to rotate it into a position where I could get it all the way out. And even then my socket wouldn't fit on it. I had to go to the hardware store and pick up a 18mm wrench just for this job. These bolts haven't been off in a long time either, so I had to use some freeze off on them and even wack it a couple times with the rubber mallet to loosen it up.
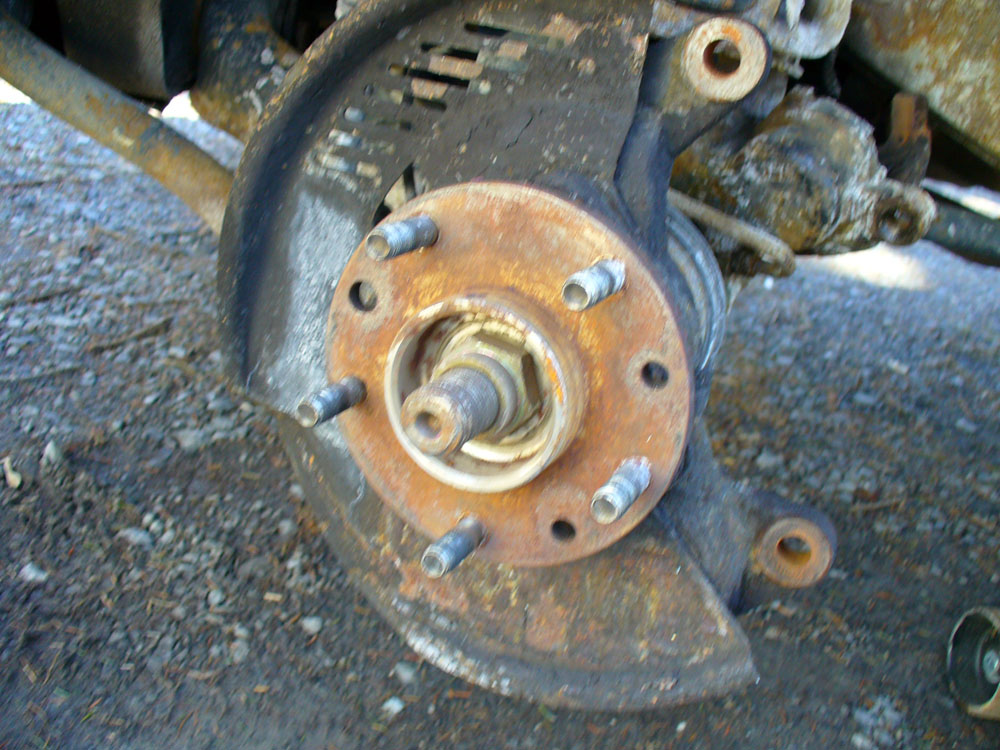
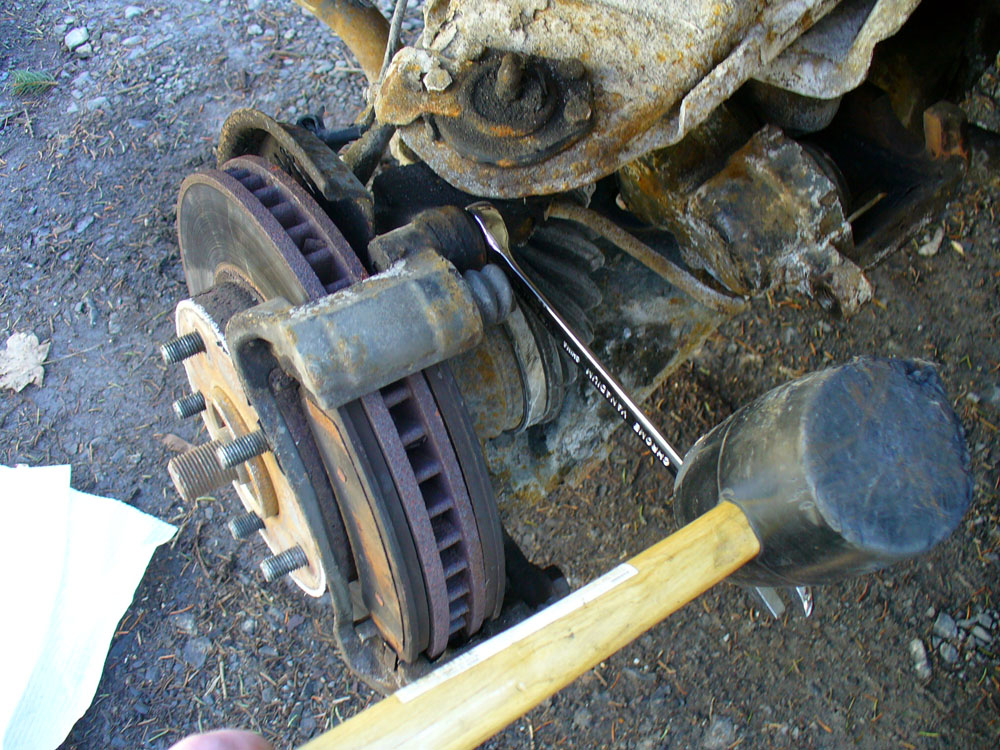
9) Now that that is off, heres what everything looks like separated. You can take off the old brake pads at this point. You may have to use a rubber mallet to wack them off the brake pad holder if they are stubborn.
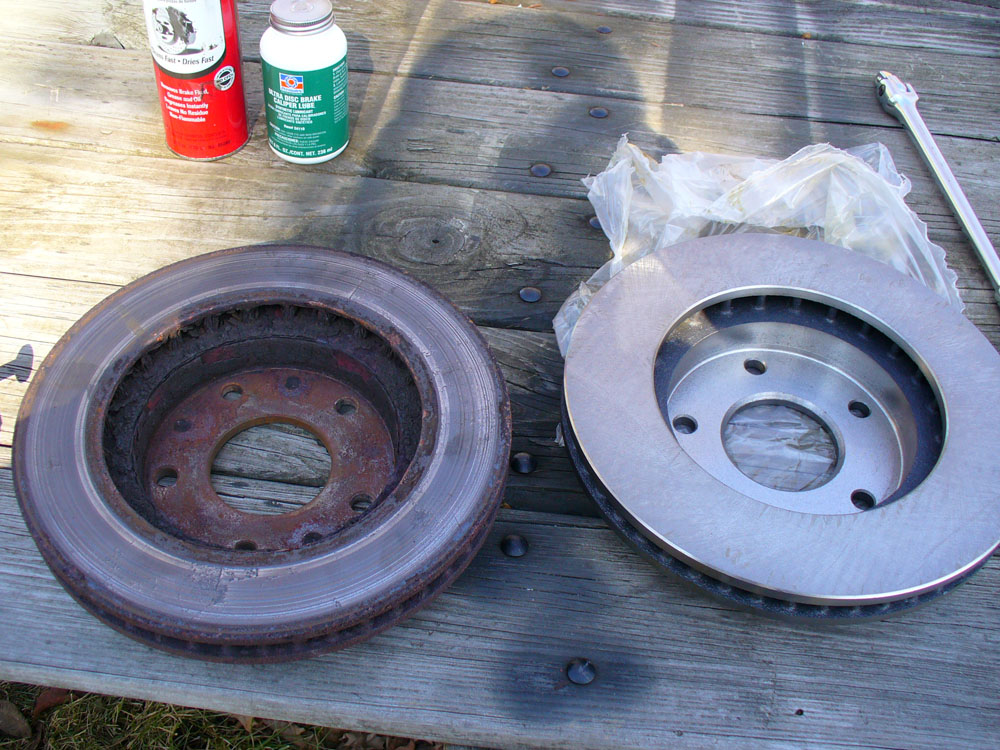
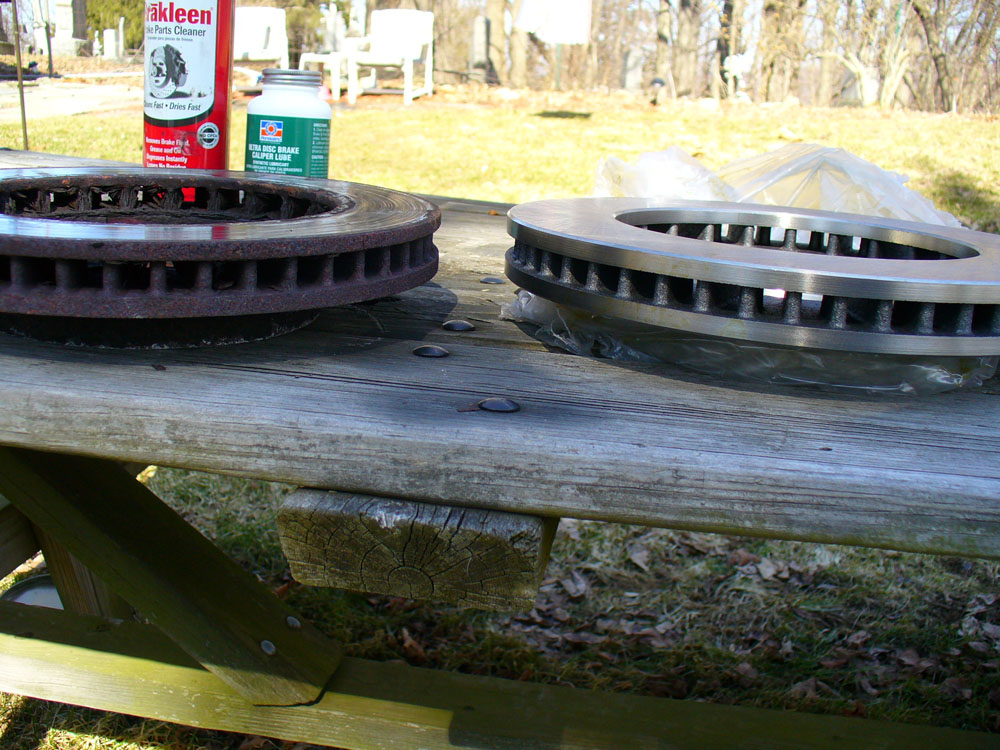
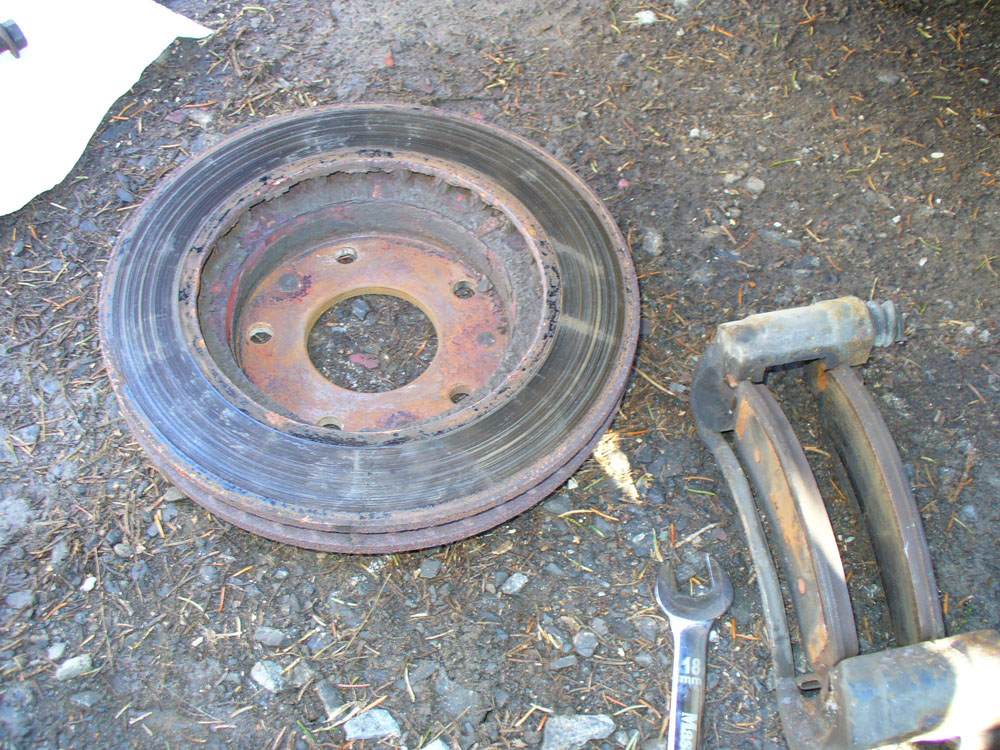
10) Here are some pics of the old rotor compared to the new one. The thickness isn't bad on the old one, but it has some bad groves in it. Rotors are supposed to be smooth. Also, if you wanted to, you could take your old rotors to a mechanic and have them machined. As long as they still have a good thickness to them, having them machined back to smoothness will make them re-useable. It generally costs about half as much as buying new rotors. It depends tho.
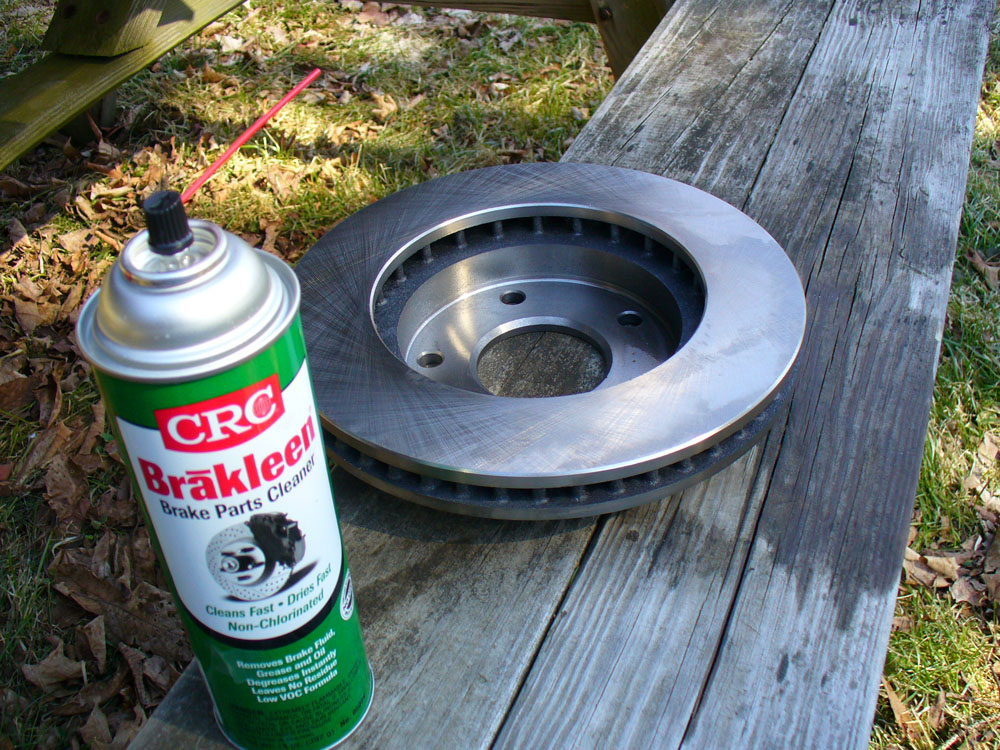
11) Before you put your new rotor on, heavily spray that bastard down with brakleen to clean it. It may look clean, but you must make sure it is free from all oils usually leftover from manufacturing. Brakleen dissolves oil and greese away and drys very quickly.
12) If your brake pads came with clips, follow the directions that came with them and apply the clips. Also, spray the side of the brake pads that will come in contact with the rotor with brakleen.

13) Now prepare your caliper for the new hardware. Your caliper pistons are probably still out a bit. I like to put some caliper/brake greese on them at this point. Next put one of your old brake pads on the caliper and use the brake caliper clamp to push the caliper flush. If your car has two pistons like this one, alternate back and forth between the two until they are both flush around the same time. A C-Clamp can also be used for this if you have one. Once thats done, wipe off some of the excess greese with paper towels.
14) Now reassemble the entire thing. The rotor goes right on. I recommend reattaching the brake pad holder first before putting the new brake pads on. Also, if you accidentally get any greese or grime from your hands on the rotor or the part of the brake pads that touch the rotor, respray them with brakleen. You do not want greese or oil on those parts. Also, make sure you do not get any greese or oil on the lug nut bolts. If you do, spray those with brakleen too.
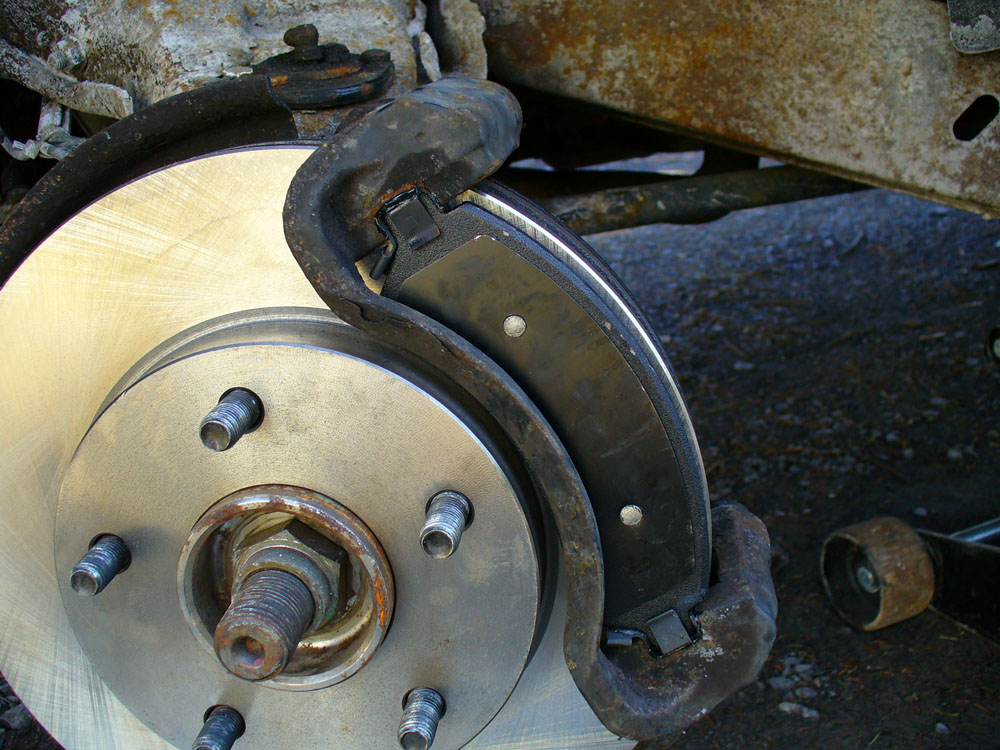
15) Heres a side view shot. You'll notice I put some brake greese on the two metal nubs where the brake pads are connected to the brake pad holder. The brake pads should have a little movement to them when sitting on there and the greese helps with that small amount of movement.
16) Now put the caliper back on. It should fit on pretty easy now that the caliper pistons are pushed back. When putting the bolt pins back in, I would rub some brake/caliper greese on them first and slide them back into place and then tighten them on. Also, becareful not to over tighten any of the bolts. Tighten them to the point where you can't move them anymore, then give them one last strong tug to make sure they are tight. Other than that, don't over do it. Once the caliper is back on, test your brakes by having someone turn the car on and press on the brakes slowly all the way down. Then release slowly. Do that a couple times and try moving the rotor while the brake is down. If it doesn't move then you did good. Once the brakes are released, make sure the rotor moves again freely. It may be a little harder to move it now, but as long as it moves, then good. Doing this a couple times gets the calipers back into position for correct braking on the road.
17) Now put your tire back on and, by hand, thread your lug nuts on and tighten them. Once they are on, bust out your impact driver and tighten them up in an opposite motion. Once they are all tight, tighten them even more. At least 5-10 clicks on your driver. Then remove your jack stand and slowly lower your jack down. Do not do it too fast. Let the weight distribute itself. Once the tire is down, remove your jack and then tighten your lug nuts again with a socket wrench to make sure they are on really friggin tight.
18) Now repeat all this on the other front wheel, because you must always do a brake and/or rotor job in pairs. Also, whenever you replace your rotors, you must replace your brake pads. Never put old brake pads on new rotors. New brake pads on old rotors are ok as long as the old rotors are smooth on both sides.


0 Comments
Recommended Comments
There are no comments to display.