
Brinkmann Gourmet Charcoal Smoker Modifications

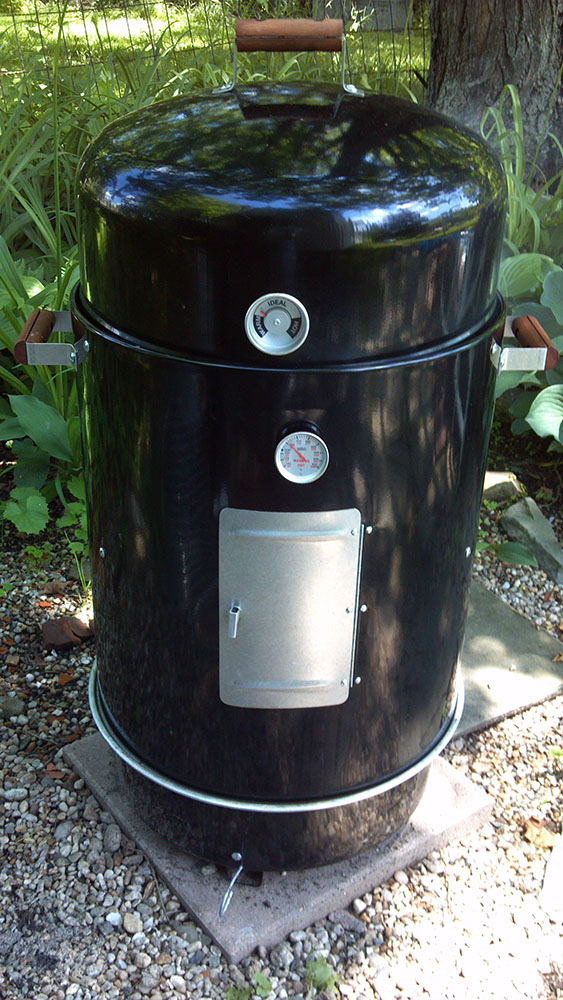
In my previous blog post I showed my new smoker:
New Brinkmann Smoker (ECB) El Cheapo Brinkmann
But the smoker didn't work out all that good right out of the box. These are the following modifications I've made to it:
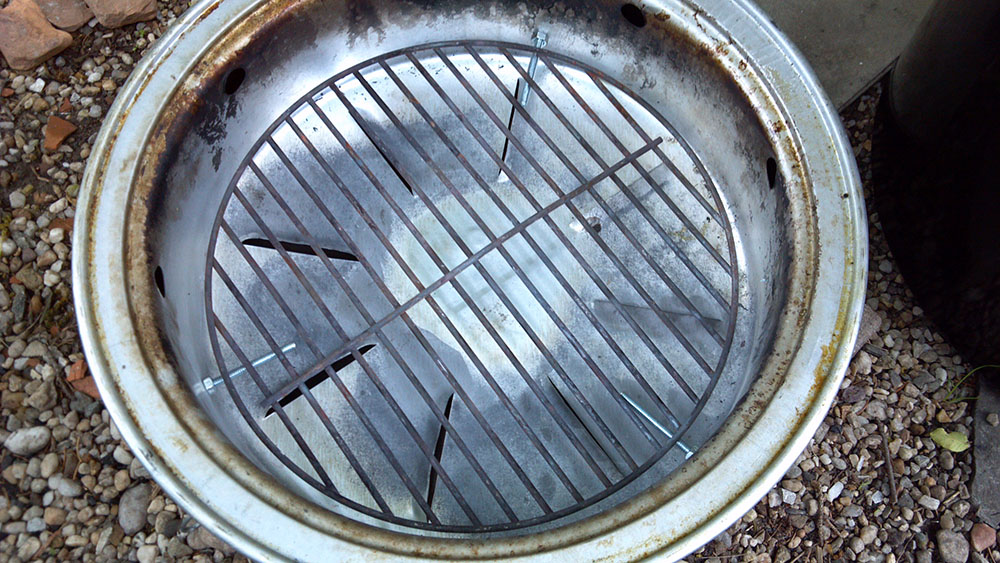
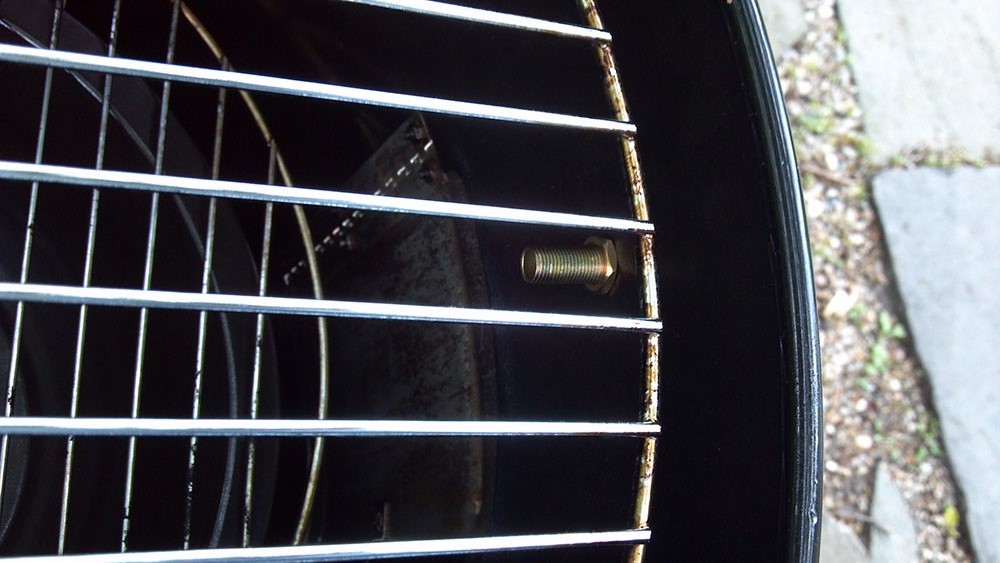
When I first got my smoker I put a grate at the bottom of the charcoal pan because I read that a grate will help in keeping ash buildup from blocking the air flow. This was not entirely correct. What I needed to do was have the grate about an inch off the bottom so that air flow can reach every piece of coal while allowing ash to sift down to the bottom. So my first modification was to use some pliers and bend the air fins open more to allow more airflow. Because I'll be able to control the airflow with another modification, I wanted to make sure the airflow would not get restricted by ash buildup. The second mod I did was to install three carriage bolts with nuts 1 inch from the bottom of the pan. This allows me to set the grate on the bolts and gets me the airflow I want. Before doing this, I attempted to use 3 equally sized rocks to lift the grate up.. Not a good idea. It worked but it didn't. The rocks change the flow of air and also absorb heat and break. Installing permanent bolts was the only real solution. Using a drill I made three holes 1 inch from the bottom and installed the bolts. I didn't want to use carriage bolts but they were the only ones I could find for the size and length I wanted to use at the local hardware store. These bolts worked out fine in the end because they didn't sit to far away from the pan's sides to affect how it sits in the base pan.
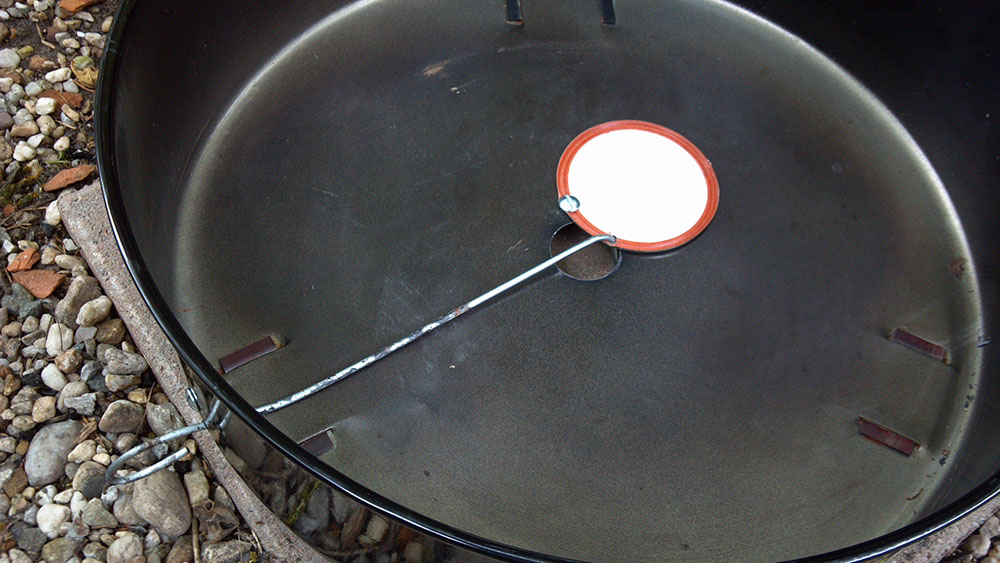
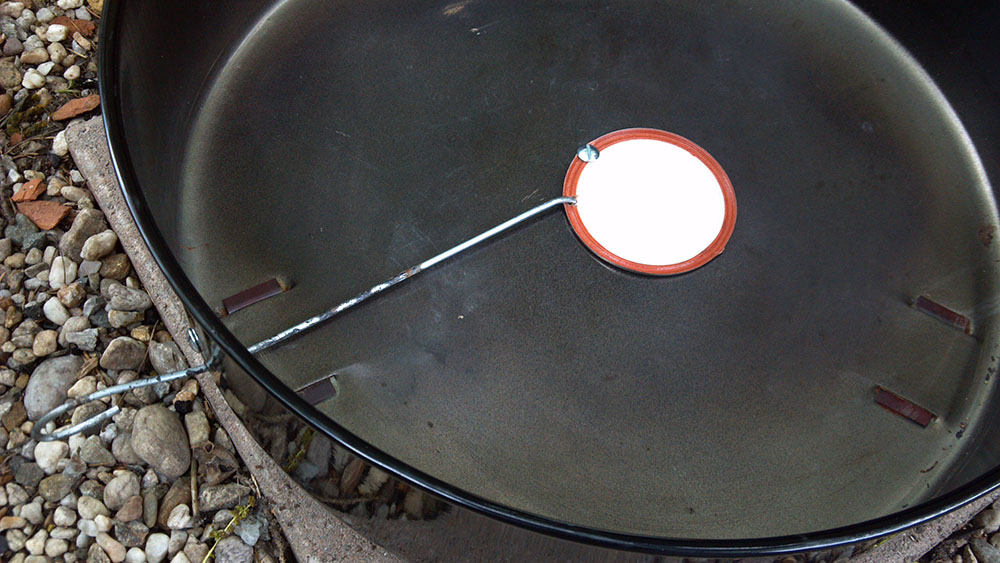
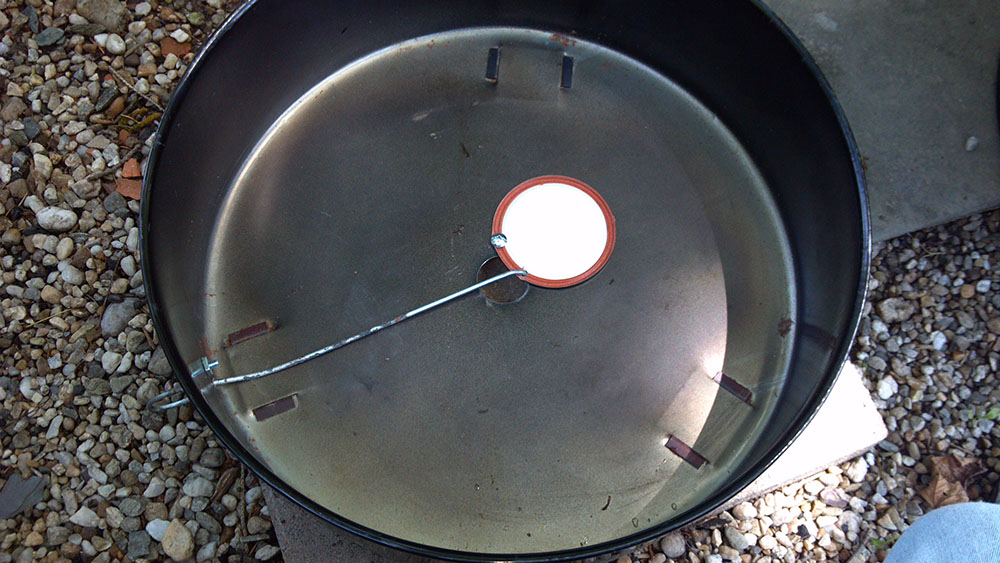
The next modification was the most time consuming. I needed to control the airflow of this smoker. This smoker has two vents. The bottom vent which is a hole about 2 inches in diameter and the other is the gap where the lid sits on the body of the smoker. The lid does not go on with a solid seal and is designed that way so there is no need for an air vent on the top. I have seen other people modify their ECB lids by installing an oven gasket around the rim to make it have a solid seal and then installing an aftermarket weber charcoal damper on the lid. However, I did not do this.. I am more concerned about the airflow coming into the smoker at the bottom than restricting or increasing the airflow from the top.
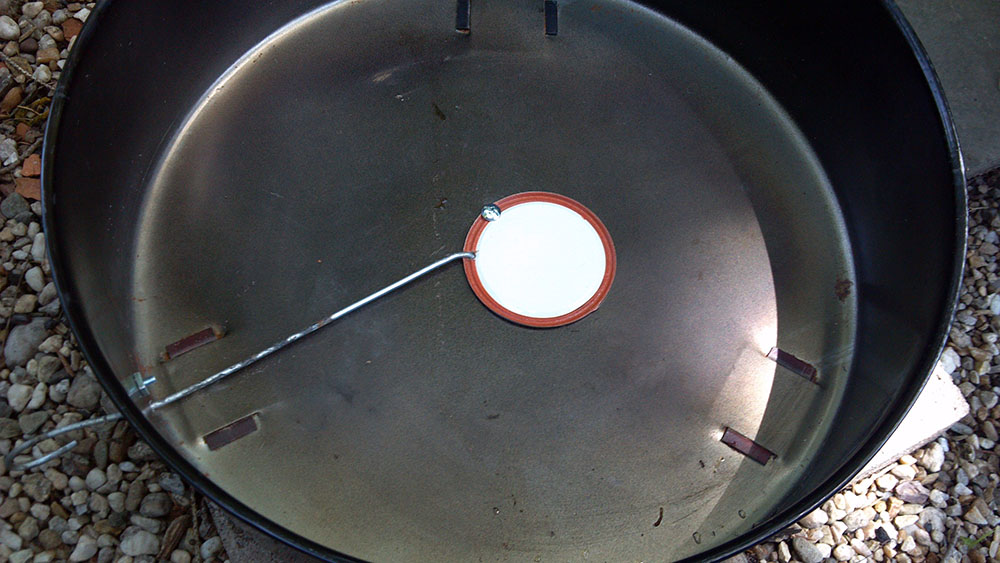
Here is what I did.. I drilled three holes into my base pan. One of those drill holes was a mistake which I'll explain in a bit. I used one bolt along with a washer, lock washer and lock nut to connect a pickle jar lid to the base of the pan. I needed to drill 2 holes into the jar lid. One to keep it connected to the base pan and the other to act as a slot for the metal control rod. Using a washer, lock washer and lock nut, the lid will stay connected without unscrewing the bolt due to repeated opening and closing. I drilled another hole into the side of the base pan to allow the metal rod to protrude out the side. This is where I messed up. I drilled the hole too high up. Once I had everything in place, I put the charcoal pan into the base pan and realized it was weighing down on the metal rod preventing me from using it correctly. So I drilled another hole right at the bottom of the side and then the pan fit perfectly. Of course this left me with a hole I had to plug up. Thankfully I the smoker came with some extra bolts and nuts and I simply used one of those to seal off the hole.
The biggest problem with this was the metal rod I was using. I had an old metal sign holding post that I decided to use because it was tough and it already had one end of it bent into a crude loop from a previous project. This was some sturdy metal. After cutting it to the right shape, I was unable to bend it by hand. My bolt cutters have metal bending rods on it and I was able to use those to bend the metal into the angles I needed. This was a pain. I forgot to take a picture of the underneath of the base pan. Its basically a piece of metal bent in three places. Once at a 90 degree angle to fit through the jar lid hole, then another bend to keep the metal from scraping the ground, and then a third bend to keep the metal from scraping the bottom of the pan. In the end it worked out good because the piece of metal has just enough weight to it that it feels sturdy and it won't disconnect. With this done, I now an adjustable damper and I have full control over the airflow.
A different angle:
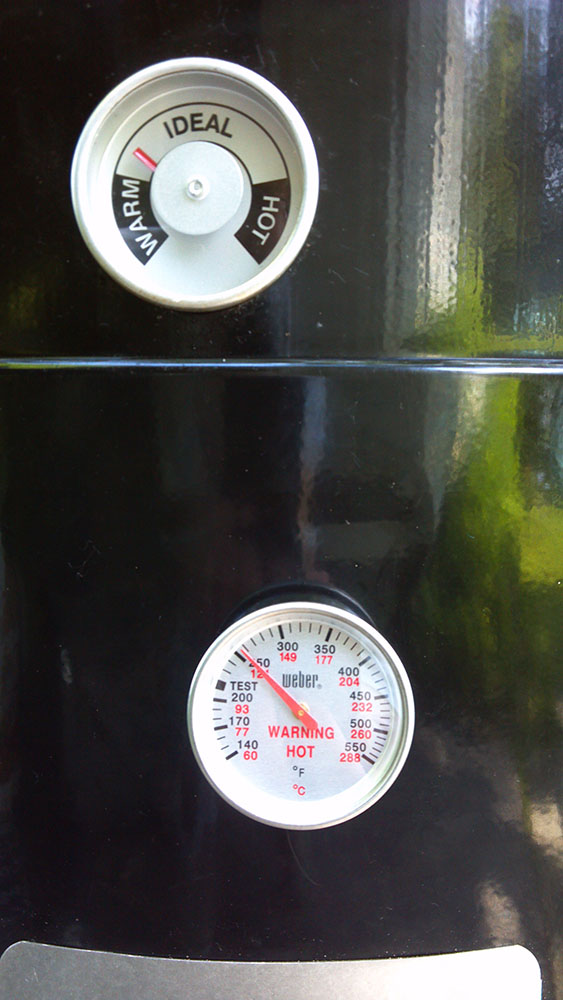
Now that I can open and close the damper to whatever amount of air flow I want to allow in, I need to be able to tell what the actual temperature of the smoker is. For this I needed to add a new thermometer. Adding a new thermometer was easier than I thought it would be. All I needed to do was drill one hole and then use a piece of simple lamp hardware found in my local hardware store's electricity aisle. Its a threaded feed-through with 2 nuts. I can't remember what the actual thing was called on the package in the store, but its basically a brass tube that is threaded for nuts to attach to it like a bolt. Its lamp hardware because electric cords usually go through the opening to the light bulb. But for me, the opening will be for my new thermometer. The hardware store only sold the things in a pack of 8 in varying sizes and the nuts were on the shelf just below them, also in a pack. I used either a 1 or 1 1/2 inch feed through with two nuts. Using a couple pliers I tightened the two nuts and kept the bulk of the feed through on the inside of the smoker to keep the thermometer level. I've seen some people recommend candy thermometers, but I chose instead to get a new Weber thermometer off amazon. Because the thermometer itself isn't installed, I can take it inside and clean it after every use.
Outside look. I installed it right above the charcoal door:
Inside look. Two nuts holding it in place. Pretty simple. I also bent this slightly downward to make sure the thermometer sits a bit more tight.
This new thermometer is significantly better than the one that came with the smoker. I can now get the smoker up to 250 and using the damper on the bottom, I can make small adjustments to the airflow and maintain a constant cooking temperature.
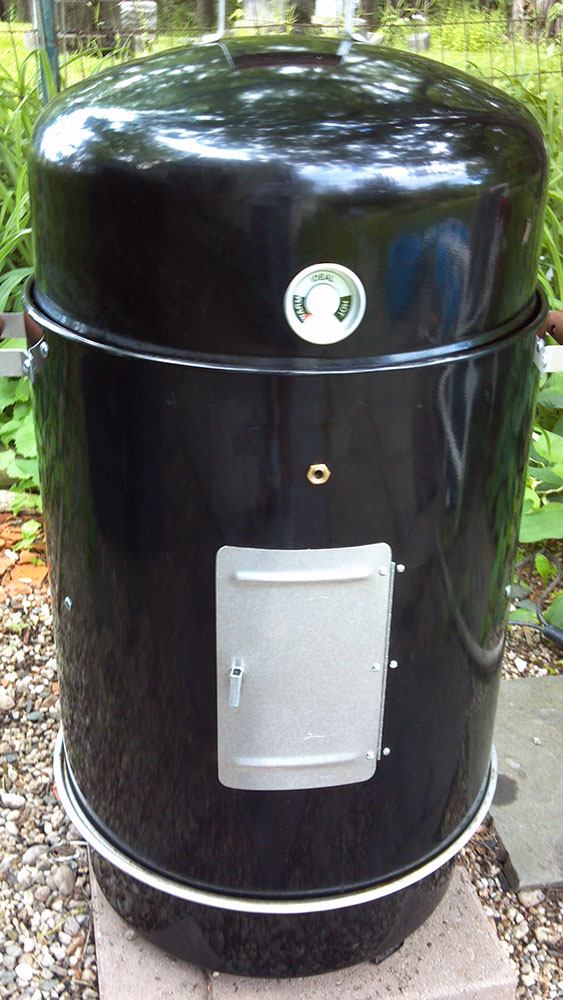
And here it is all completed:
Resources I used for this project:
http://home.comcast.net/~day_trippr/smoker_mods.htm
http://brinkmannsmokermod.blogspot.com/2011/01/simple-modification-to-brinkmann.html


0 Comments
Recommended Comments
There are no comments to display.